INTRODUCTION TO PE FILE RESOURCES
Greetings, our dear readers!
In this article, we will tell you about one important and interesting part of PE files: PE IMAGE RESOURCES (data linked to the program after its compilation). We will delve into the internal structures of the resource tree and write our own native resource parser without using WinAPI.
Resources in PE (Portable Executable) files are embedded data that form an integral part of the application. They include a variety of elements such as images, icons, text strings, dialog boxes, fonts. These resources are integrated directly into the executable file, ensuring their availability to the application during its execution. It is important to note that resources such as images, texts, and sounds are often added to the program after it has been compiled. This approach has several significant advantages, making the development process more flexible and efficient.
Imagine that you are part of a development team working on creating a new application. Your team consists of programmers, designers, and content managers. Each of you contributes to creating something unique and useful.
At the beginning of the project, programmers focus on writing and testing code. They create the framework of the application, ensuring that all functions work correctly. At the same time, designers and content managers work on creating resources - images, sounds, texts for the interface. This parallel work allows the team to move forward quickly and efficiently.
When the main part of programming is completed, it`s time to integrate the resources into the application. This is done using special tools that allow adding resources to an already compiled application without the need for recompilation. This is very convenient, especially if you need to make changes or update resources - there is no need to recompile the entire project.
One of the key aspects of this process is localization. Thanks to the separation of resources from the main code, localizing the application becomes much simpler. Interface texts, error messages can be easily translated and replaced without interfering with the main code. This allows the application to be adapted for different language markets, making it accessible and understandable to a wide range of users around the world.
EXAMPLES OF RESOURCE USAGE
- Application Icons: Icons displayed in Windows Explorer or on the taskbar provide a visual representation of the application.
- Dialog Boxes: Definitions of dialog boxes that the application displays for user interaction, such as settings or warning windows.
- Menus: Menu structures used in the user interface provide navigation and functionality.
- Strings: Localized strings used to display text in the application, including error messages, tooltips, and other user interfaces.
- Sounds: Audio files that can be played by the application in certain situations, such as sound notifications.
- Cursors: Graphic cursors used for interacting with the user interface, such as arrows, pointers, or animated cursors.
- Version Information (Version Info): Contains information about the application version, copyright, product name, and other version-related data.
- Manifest: An XML file that contains information about the application configuration, including Windows version requirements and security settings.
- RC_DATA: Arbitrary data defined by the developer, which can include binary data, configuration files, or other application-specific resources.
HOW TO VIEW AND EDIT RESOURCES IN A PORTABLE EXECUTABLE FILE?
Can we view and edit resources in a compiled application? Absolutely! All you need is the right tool. There are tools that offer a wide range of capabilities for working with resources in compiled executable files, including viewing, editing, adding, and deleting resources.
Here is a list of resource editors that can be used to view or edit resources in already compiled executable files:
- Resource Hacker: This is a resource editor for 32-bit and 64-bit Windows applications. It allows you to view and edit resources in executable files (.exe, .dll, .scr, etc.) and compiled resource libraries (.res, .mui). Resource Hacker
- ResEdit: A free resource editor for Win32 programs. Suitable for working with dialogs, icons, version information, and other types of resources. ResEdit
- Resource Tuner: A resource editor that allows you to open executable files with problems and edit hidden data that other editors simply do not see. Resource Tuner
- Resource Builder: A powerful, full-featured resource editor for Windows. Allows you to create, edit, and compile resource files (.RC, .RES, and others), as well as edit resources in compiled executable files. Resource Builder
- Visual Studio: Provides a resource editor that allows you to add, delete, and modify resources. Visual Studio
- Resource Tuner Console: A powerful command-line tool for editing resources, ideal for use in batch (.bat) files. Resource Tuner Console
- Qt Centre: Allows you to edit resource files of compiled executable files using Qt. Qt Centre
Let`s take a closer look at the first tool on the list: Resource Hacker.
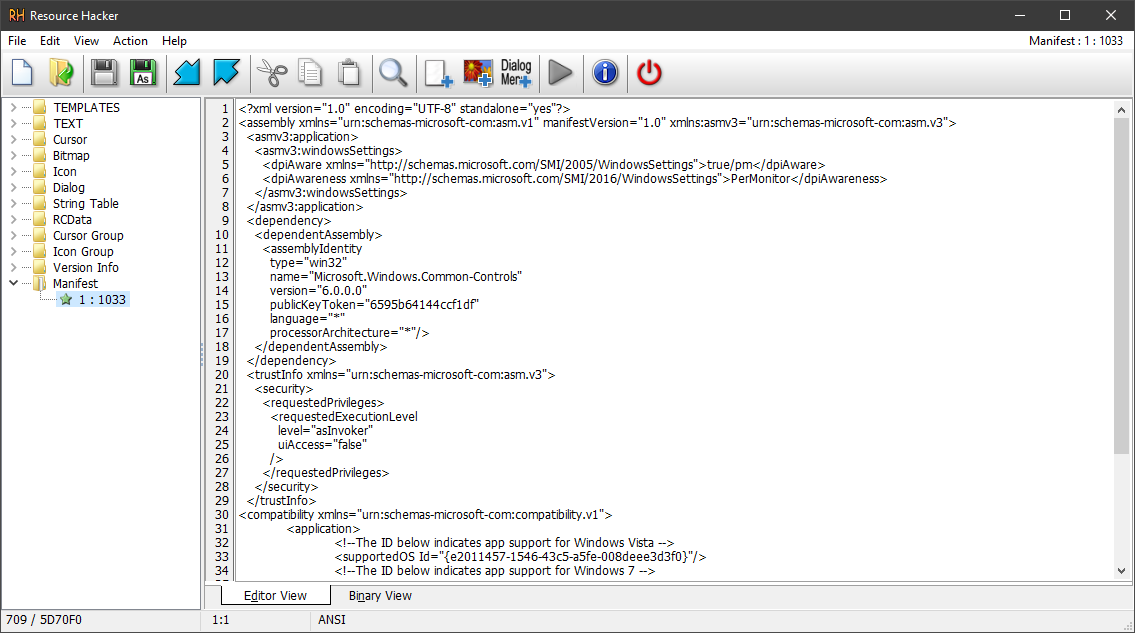
This tool not only allows you to view and extract resources from an executable file, but also to edit them!
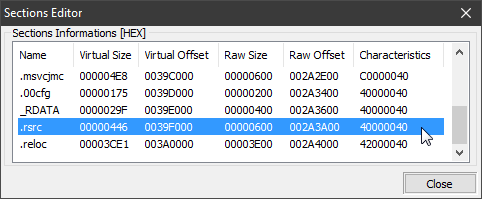
These resources, which can include icons, menus, dialog boxes, and other types of data, are typically located in a specific section of the PE file known as .rsrc (resource section). However, it's important to note that this is not a strict rule and exceptions can occur.
An essential aspect of navigating and accessing these resources within a PE file is the IMAGE_DATA_DIRECTORY[IMAGE_DIRECTORY_ENTRY_RESOURCES]. This directory entry is part of the PE file's optional header, specifically within the data directories array. It serves as a pointer or reference to the resources in the image. The IMAGE_DIRECTORY_ENTRY_RESOURCES provides information about the location (such as the relative virtual address) and size of the resource data.

RESOURCE STRUCTURE IN PORTABLE EXECUTABLE FILES
General Overview
Let`s take a detailed look at the structures used in the resource section of a PE (Portable Executable) file. The resource section in Windows PE files has a unique three-level hierarchical tree structure. This tree is used to organize and access resources such as icons, cursors, strings, dialogs, and others. Here`s how it`s structured:
Level 1: Resource Types
At the top level of the tree are the resource types. Each resource type can be identified either by a numerical identifier (ID) or by a string name.
Level 2: Resource Names
At the second level, each resource type has its own names or identifiers. This allows you to have multiple resources of the same type, such as multiple icons or rows.
Level 3: Resource Languages
On the third level, each resource has variants for different language localizations. This allows for the same resource, such as a dialog, to be localized in different languages.
Data Structures
The following data structures are used to represent this hierarchy:
- IMAGE_RESOURCE_DIRECTORY: This structure represents a header for each level of the tree and contains general information about the entries at that level.
- IMAGE_RESOURCE_DIRECTORY_ENTRY: These are elements that can either be subdirectories (pointing to another IMAGE_RESOURCE_DIRECTORY) or the final leaves of the tree, pointing to the actual resource data.
- IMAGE_RESOURCE_DATA_ENTRY: This structure points to the resource data itself and contains its size and offset.
The visualization of the resource tree might look as follows:
Root (IMAGE_DATA_DIRECTORY[IMAGE_DIRECTORY_ENTRY_RESOURCES].VirtualAddress)
|
+-- Type (RT_ICON, RT_STRING, ...)
    |
    +-- Name (ID or String)
        |
        +-- Language (Locale ID)
            |
            +-- Data (Actual resource data)
IMAGE_RESOURCE_DIRECTORY
|
|-- IMAGE_RESOURCE_DIRECTORY_ENTRY (Resource Types)
|   |-- IMAGE_RESOURCE_DIRECTORY (Resource names)
|   |   |-- IMAGE_RESOURCE_DIRECTORY_ENTRY (Names)
|   |   |   |-- IMAGE_RESOURCE_DIRECTORY (Languages)
|   |   |   |   |-- IMAGE_RESOURCE_DIRECTORY_ENTRY (Languages)
|   |   |   |   |   |-- IMAGE_RESOURCE_DATA_ENTRY (Resource data)
Each node in this tree represents an IMAGE_RESOURCE_DIRECTORY, and the leaves are IMAGE_RESOURCE_DATA_ENTRIES, which directly point to the resource data. When manually parsing resources, a developer must go through this tree, starting from the root, and sequentially navigate all levels to find the necessary data.
IMAGE_RESOURCE_DIRECTORY
This structure serves as a header for each level of the resource tree and contains information about the entries at that level.
typedef struct _IMAGE_RESOURCE_DIRECTORY {
    DWORD   Characteristics;
    DWORD   TimeDateStamp;
    WORD    MajorVersion;
    WORD    MinorVersion;
    WORD    NumberOfNamedEntries;
    WORD    NumberOfIdEntries;
    //  IMAGE_RESOURCE_DIRECTORY_ENTRY DirectoryEntries[];
} IMAGE_RESOURCE_DIRECTORY, *PIMAGE_RESOURCE_DIRECTORY;
- Characteristics: Typically unused and set to 0.
- TimeDateStamp: The timestamp of the resource creation.
- MajorVersion and MinorVersion: The version of the resource directory.
- NumberOfNamedEntries: The number of resource entries with names.
- NumberOfIdEntries: The number of resource entries with numeric identifiers.
IMAGE_RESOURCE_DIRECTORY_ENTRY
Elements that can either be subdirectories or the final leaves of the tree.
typedef struct _IMAGE_RESOURCE_DIRECTORY_ENTRY {
    union {
        struct {
            DWORD NameOffset:31;
            DWORD NameIsString:1;
        };
        DWORD   Name;
        WORD    Id;
    };
    union {
        DWORD   OffsetToData;
        struct {
            DWORD   OffsetToDirectory:31;
            DWORD   DataIsDirectory:1;
        };
    };
} IMAGE_RESOURCE_DIRECTORY_ENTRY, *PIMAGE_RESOURCE_DIRECTORY_ENTRY;
- Name: If NameIsString is set to 1, this field contains an offset pointing to a UNICODE string representing the name of the resource. If NameIsString is set to 0, the Id field is used to identify the resource by a numeric identifier.
- OffsetToData: If DataIsDirectory is set to 1, this field contains an offset pointing to another IMAGE_RESOURCE_DIRECTORY (i.e., a subdirectory). If DataIsDirectory is set to 0, this offset points to an IMAGE_RESOURCE_DATA_ENTRY.
IMAGE_RESOURCE_DATA_ENTRY
This structure points to the actual data of the resource.
typedef struct _IMAGE_RESOURCE_DATA_ENTRY {
    DWORD   OffsetToData;
    DWORD   Size;
    DWORD   CodePage;
    DWORD   Reserved;
} IMAGE_RESOURCE_DATA_ENTRY, *PIMAGE_RESOURCE_DATA_ENTRY;
- OffsetToData: The offset from the beginning of the resource section to the resource data.
- Size: The size of the resource data in bytes.
- CodePage: The code page used for encoding the resource data.
- Reserved: Reserved; typically set to 0.
IMPORTANT! Offsets in IMAGE_RESOURCE_DIRECTORY and IMAGE_RESOURCE_DIRECTORY_ENTRY are calculated from the start of the resources (IMAGE_DATA_DIRECTORY[IMAGE_DIRECTORY_ENTRY_RESOURCES].VirtualAddress), and only the offsets in IMAGE_RESOURCE_DATA_ENTRY are calculated from the start of the base image!
LET`S WRITE A NATIVE RESOURCE PARSER!
It`s time to write our own native resource parser without using WinAPI! Manual parsing of resources, instead of using Windows API functions such as EnumResourceTypes or EnumResourceNames, has several advantages, especially in the context of security analysis and antivirus scanning:
- Security: API functions like EnumResourceTypes and EnumResourceNames require the executable file to be loaded into the process`s address space, which could lead to the execution of malicious code if the file contains viruses or trojans. Manual parsing of resources avoids this risk.
- Platform Independence: Manual resource parsing is not dependent on the operating system version and its WinAPI, making it a more universal solution.
- Heuristic Analysis: Manual parsing allows for the application of complex heuristics and detection algorithms that may be necessary to identify new or unknown threats.
- Performance: Parsing can be optimized for better performance compared to using WinAPI, especially when scanning a large number of files.
- Control: With manual parsing, the analyst has full control over the process and can fine-tune it for specific analysis needs, whereas API functions provide limited control and may not reveal all aspects of resources.
- Protection: Malware can use various methods to evade detection, including manipulating resources in a way that they are not detected by standard APIs. Manual parsing allows for the detection of such manipulations.
- Full Access: API functions may not provide access to all resources, especially if they are corrupted or deliberately altered. Manual parsing allows for the analysis of all data without the limitations imposed by the API.
- Error Handling: When using API functions, error handling can be limited, whereas manual parsing allows for more flexible responses to non-standard situations and anomalies in the file structure.
struct ResourceInfo
{
    DWORD Size; 	// Size of the resource data
    PBYTE data; 	// Offset of the resource data from the beginning of the file

    union {
        WORD TypeID;                        // Resource type ID or
        PIMAGE_RESOURCE_DIR_STRING_U Type;  // resource type
    };

    union {
        WORD NameID;                        // Resource name ID or
        PIMAGE_RESOURCE_DIR_STRING_U Name;  // resource name
    };

    WORD  Language; // Language of the resource
};

std::optional> getAllResources(BYTE* pBase, uint64_t fileSize)
{
    IMAGE_RESOURCE_DIRECTORY* pTypesDirectory = nullptr;
    std::vector resources;

    try
    {
        //********************************************************
        //  parse PE header
        //********************************************************
        IMAGE_DOS_HEADER* pDosHeader = reinterpret_cast(pBase);
        IMAGE_NT_HEADERS* pNtHeaders = reinterpret_cast(pBase + pDosHeader->e_lfanew);

        // Verify that the PE signature is valid, indicating a valid PE file.
        if (pNtHeaders->Signature != IMAGE_NT_SIGNATURE)
            return std::nullopt;

        // Depending on the machine type (32-bit or 64-bit), obtain the resource directory data.
        IMAGE_DATA_DIRECTORY resourceDirectory;
        switch (pNtHeaders->FileHeader.Machine)
        {
        case IMAGE_FILE_MACHINE_I386:
            resourceDirectory = reinterpret_cast(pNtHeaders)->OptionalHeader.DataDirectory[IMAGE_DIRECTORY_ENTRY_RESOURCE];
            break;
        case IMAGE_FILE_MACHINE_AMD64:
            resourceDirectory = reinterpret_cast(pNtHeaders)->OptionalHeader.DataDirectory[IMAGE_DIRECTORY_ENTRY_RESOURCE];
            break;
        default:
            return std::nullopt;
        };

        // If the resource directory is empty, exit as there are no resources.
        if (resourceDirectory.Size == 0)
            return std::nullopt;

        // Convert the RVA of the resources to a RAW offset
        uint64_t resourceBase = ntpe::RvaToOffset(pBase, resourceDirectory.VirtualAddress);
        IMAGE_RESOURCE_DIRECTORY* pResourceDir = reinterpret_cast(pBase + resourceBase);

        //********************************************************
        // Start parsing the resource directory
        //********************************************************
        // Iterate through type entries in the resource directory.
        // parse types
        pTypesDirectory = pResourceDir;
        IMAGE_RESOURCE_DIRECTORY_ENTRY* pTypeEntries = (IMAGE_RESOURCE_DIRECTORY_ENTRY*)(pTypesDirectory + 1);

        for (uint64_t ti = 0; ti < pTypesDirectory->NumberOfNamedEntries + pTypesDirectory->NumberOfIdEntries; ti++)
        {
            // parse names
            IMAGE_RESOURCE_DIRECTORY_ENTRY* pTypeEntry = &pTypeEntries[ti];
            IMAGE_RESOURCE_DIRECTORY* pNamesDirectory = (IMAGE_RESOURCE_DIRECTORY*)(pBase + (pTypeEntry->OffsetToDirectory & 0x7FFFFFFF) + resourceBase);
            for (uint64_t ni = 0; ni < pNamesDirectory->NumberOfNamedEntries + pNamesDirectory->NumberOfIdEntries; ni++)
            {
                //  parse langs
                IMAGE_RESOURCE_DIRECTORY_ENTRY* pNamesEntries = (IMAGE_RESOURCE_DIRECTORY_ENTRY*)(pNamesDirectory + 1);
                IMAGE_RESOURCE_DIRECTORY_ENTRY* pNameEntry = &pNamesEntries[ni];
                IMAGE_RESOURCE_DIRECTORY* pLangsDirectory = (IMAGE_RESOURCE_DIRECTORY*)(pBase + (pNameEntry->OffsetToDirectory & 0x7FFFFFFF) + resourceBase);
                for (uint64_t li = 0; li < pLangsDirectory->NumberOfNamedEntries + pLangsDirectory->NumberOfIdEntries; li++)
                {
                    //  parse data
                    IMAGE_RESOURCE_DIRECTORY_ENTRY* pLangsEntries = (IMAGE_RESOURCE_DIRECTORY_ENTRY*)(pLangsDirectory + 1);
                    IMAGE_RESOURCE_DIRECTORY_ENTRY* pLangEntry = &pLangsEntries[li];
                    IMAGE_RESOURCE_DATA_ENTRY* pDataEntry = (IMAGE_RESOURCE_DATA_ENTRY*)(pBase + resourceBase + pLangEntry->OffsetToData);

                    // Save the resource information in a structured format.
                    ResourceInfo entry = {};
                    entry.Language = pLangsEntries->Id;
                    entry.Size = pDataEntry->Size;
                    entry.Type = (PIMAGE_RESOURCE_DIR_STRING_U)(pTypeEntry->NameIsString) ? (PIMAGE_RESOURCE_DIR_STRING_U)(pBase + pTypeEntry->NameOffset + resourceBase) : (PIMAGE_RESOURCE_DIR_STRING_U)(pTypeEntry->Id);
                    entry.Name = (PIMAGE_RESOURCE_DIR_STRING_U)(pNameEntry->NameIsString) ? (PIMAGE_RESOURCE_DIR_STRING_U)(pBase + pNameEntry->NameOffset + resourceBase) : (PIMAGE_RESOURCE_DIR_STRING_U)(pNameEntry->Id);
                    entry.data = ntpe::RvaToRaw(pBase, pDataEntry->OffsetToData);
                    resources.push_back(entry);
                }
            }
        }

        return resources;
    }
    catch (std::exception&)
    {
        return std::nullopt;
    };
}
You can find the code of the entire project on our github:
https://github.com/SToFU-Systems/DSAVE
The resource parser returns a vector with structures containing pointers to resource types, their names, and the language identifier of each resource. In each structure, there is a pointer to the resource data. Each structure remains valid as long as the executable file we read and parsed is in memory. This is very convenient for writing your own antivirus and scanning files. After the file is released, the pointers become invalid.
LIST OF TOOLS USED
- PE Tools: https://github.com/petoolse/petools This is an open-source tool for manipulating header PE fields. Supports x86 and x64 files.
- Resource Hacker: https://www.angusj.com/resourcehacker. This is a resource editor for 32-bit and 64-bit Windows applications. It allows you to view and edit resources in executable files (.exe, .dll, .scr, etc.) and compiled resource libraries (.res, .mui).
CONCLUSION
And that`s it, friends!
We have explored the resources of PORTABLE_EXECUTABLE files of the Windows operating system and wrote our own, simple yet quite effective native resource parser!
We appreciate your support and look forward to your continued engagement in our community!
Any questions of the authors of the article can be sent to the email: articles@stofu.io
Thank you!